Fabric Name Banner Tutorial
One of the many things we created for our daughters' room was their own name banners that hang above their beds. This project was actually easier then I expected. Here is how I did it.
First I found the font I wanted to use on Word. I printed out the letters I needed in a 250 font size and cut them out.
Then I laid them out on the letter fabric and traced them.
Next I carefully cut out all of the letters.
For the triangles I chose a heavy home decor fabric that I had left over from another project. I made a template out of paper and traced it onto the fabric as well. The triangles were 6 inches wide and 8 inches long. I used pinking shears to cut them out.
I then laid the letters on the triangles to come up with the distance I needed from the top before I adhered them. Don't forget to leave room for your bias tape at the top as well.
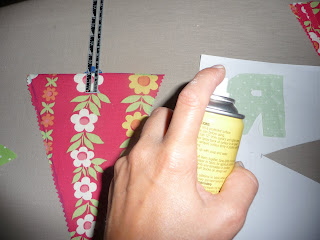
Next I sprayed the backs of the letters with a temporary fabric adhesive spray and placed the letters onto the triangles.
I then sewed the letters onto the fabric using a tight zigzag stitch to give it a cleaner look as well as to make the letters stand out from the fabric.
Once the letters have all been sewn lay them all out in order with correct spacing between them. Stretch out your double fold bias tape to make sure that it is long enough for the name before you start to sew.
I found it easier to not pin the pieces to the bias tape but to add them as I sewed so that it didn't weigh down the tape. I started at one end and of the bias tape and sewed the full length of the tape.
And that's it! It didn't take long at all to sew and the girls love them. I'm hoping to find some time to make some that say "Happy Birthday" "Thanksgiving" "Happy Halloween" and "Merry Christmas".
For more great ideas join us on:
Get your Craft On
Make do Monday
DIY Day
Tackle it Tuesday


6 comments:
Thanks for linking to Make-Do Mondays, this is exactly the type of things we are looking for!
I think I would like to make a Happy Birthday banner for sure. Then make one for each holiday. This has so many possibilities and seems quite easy.
Thanks for the wonderful tutorial. Come visit us again soon. Many thanks.
Shari
looks super cute and do-able!
so cute!! a couple of days ago i made something similar to add to my halloween decor.
Thanks for the great tutorial! I really enjoyed looking around your blog! What great ideas!!
*Eliza’s blog*
This seems so easy to do, I'll have to try it out this weekend. I love how hefty the banners look, not home-made at all. Great tutorial!
I would prefer using some stickers, the sewed process looks very hard for me, first, I don't have a machine to do that, and second I don't have the skills to do that hahaha, thank you for the info though.
Post a Comment